It may seem counterintuitive to plant a vegetable that grows largely underground in a pot with restricted soil space.
But, oddly enough, potatoes actually do quite well when planted in containers. In fact, growing them in pots can be easier than growing them in the ground.
In this article, we’ll show you why container potato gardening is easier and how to grow potatoes successfully in pots using our ten simple steps. We’ll also look at some common issues people run into when growing potatoes and some of our other favorite plentiful container veggies.
Table of Contents
Why You Should Grow Potatoes in Containers
Sometimes, growing vegetables in pots is less about convenience and more about not having any other option. But even if you do have a garden bed and some space, you still may want to consider this option.
While it is true that container-grown potatoes typically have a lower yield and don’t produce large tubers, they are much easier to harvest.
Growing potatoes in the ground often means carefully sifting through mountains of soil at the end of the season to find your yield. As you dig around, it is almost impossible to avoid slicing through some of those potatoes with your shovel. Not to mention the fact that you’ll be turning up lots of dormant weed seeds in the process.
But in a pot, harvesting your potatoes is simple. All you have to do is dump the container out at the end of the season and all your potatoes are right there for easy picking.
Some specialty pots even contain easy-access doors for harvesting potatoes without pulling the plant or disrupting the root system.
By choosing the right variety of potato and following our other tips below, you can take advantage of this huge benefit without sacrificing much in terms of overall yield.
10 Tips for Growing Potatoes in Pots
Potatoes are generally easy plants to grow, but getting them to produce well can be a bit tricky, especially in pots. Here are 10 tips to help you get started on the right track.
1. Choose the Right Seed Potato
Unlike most veggies, potatoes aren’t started with traditional seeds or seedlings. Instead, potato plants for production are generally started from seed potatoes, or potato tubers with sprouting eyes.
Seed potatoes can be purchased from nurseries or online. Look for reputable retailers that offer organic varieties.
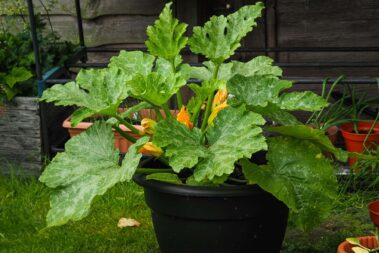
In terms of the best types of potatoes for growing in containers, look for smaller varieties. Gem, fingerling, and red potatoes are all great choices. Large potatoes like russet won’t have enough room to grow to full size in a pot and your yields will be much lower.
Also, look for varieties that mature mid to late-season. These types will produce more potatoes than those that mature and die off early in the summer.
2. Take Time to Prepare Your Seed Potatoes
To increase your odds of growing healthy, productive plants you’ll need to take some time to properly prepare your seed potatoes before planting them.
Cut your seed potatoes into 1 to 2-inch chunks, assuring each piece has at least one eye. Small seed potatoes can be left whole. The more chunks you have, the more plants you can grow. Each plant will need about 5 gallons of soil to itself and plants should be spaced at least 5 inches apart within the same pot.
Set the newly cut seed potatoes out on a plate or paper towel for about 48 hours to allow them to air dry. This will help prevent rotting once the potatoes are planted
3. Pick a Sunny Location
While you are waiting for your seed potatoes to cure, it’s time to start planning your potato container garden.
Potatoes are nightshades just like tomatoes and peppers. And just like their hot-headed cousins, potato plants need plenty of light and heat to grow well.
When choosing a spot to put your potato container garden, look for an area that gets at least six hours of direct sunlight each day. Placing pots against a south-facing wall will help give the plants the heat they crave.
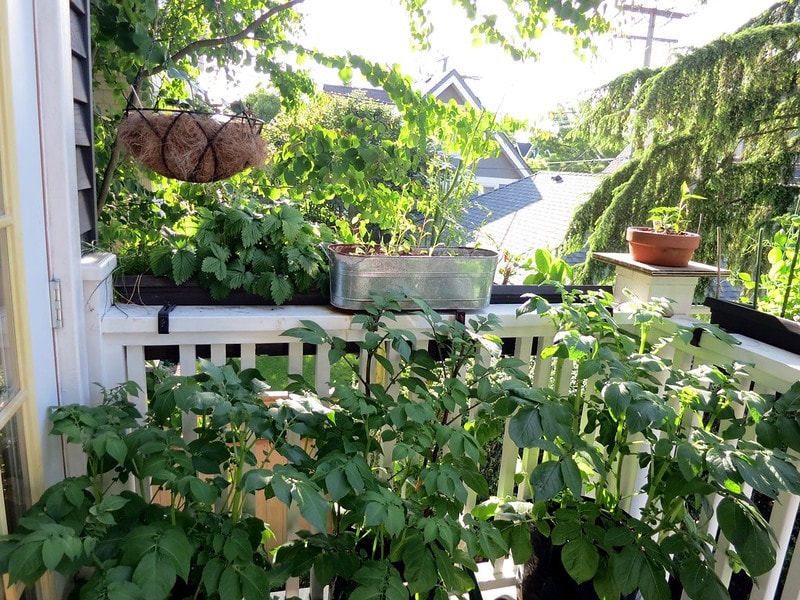
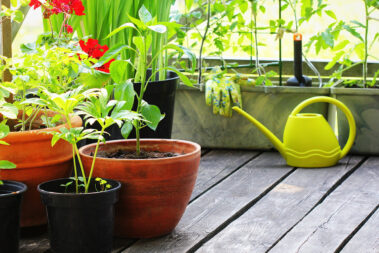
4. Pick the Right Pot
Where your pot is located is almost as important as the type of pot you use.
Obviously, the larger the container, the more potatoes your plant will be able to produce. Ten to 15-gallon pots are optimal, just make sure they aren’t too tall. Over 2 feet tall is ideal, but anything over 3 feet is going to be difficult to work with.
Any plastic or metal pot will do, just make sure there are plenty of drainage holes in the bottom. If there are only a couple, take a drill and make a few more of your own.
Fabric pots, like these from Vivosun, provide plenty of airflow and drainage for the soil. Plus, they have handles, which makes them much easier to move around even when full.
Special potato pots with harvest doors are becoming more popular. Just make sure to pick a quality brand with tight sealing doors that won’t allow the soil to dry out too fast. We like these heavy-duty potato bags from ANPHSIN.
No products found.
5. Start Your Potatoes Off Right
The starchy tubers that we call potatoes form off of rhizomes that grow horizontally underground off the main plant shoot. This means that all of the potatoes your plant produces will form in the soil above the seed potato you plant.
For this reason, it is incredibly important that you do two things: first, place your seed potato at the right depth, and, second, “hill” soil as the plant grows.
Plant your seed potatoes directly in the pot after the risk of frost has passed. Fill your pot with about 6 inches of quality, organic potting soil. Then, place your cured seed potatoes eyes up on the soil surface. Again, make sure to allow at least 5 inches of space between each plant.
Cover the seed potatoes with 4 to 6 inches of potting oil. Too much may stress the plant as the shoot struggles to grow up to find light. But too little and there won’t be enough room for your first set of potatoes to form.
There should be plenty of room between the top of the soil and the top of the pot.
6. Keep the Soil Moist
Potatoes enjoy consistently moist soil but don’t like standing water. Because you prepared your pots with plenty of holes, drainage should not be a problem.
Check the soil moisture level each day by poking your finger under the surface. If the first inch or so is dry, then water generously. As the season heats up, you will likely have to water every day. Shoot for morning waterings to reduce evaporation and avoid your plants sitting in boggy conditions overnight.
7. Fertilize Every Two Weeks
Like other nightshades, potatoes go through nutrients rather quickly, especially in pots.
If you start off with quality, fresh potting soil, you should not have to start fertilizing until your plant is a few inches tall. Once this happens, fertilize every two weeks with a high-phosphorus vegetable fertilizer to support vigorous tuber growth.
8. “Hill” as Needed to Encourage Growth
The key to bountiful potato production is a process called “hilling.”
Because tubers form horizontally underground off the main shoot, you can increase your yield by adding more soil around the plant as it grows.
Once your plant hits 8 inches tall, add about two inches of potting soil to the container. Continue to add soil every couple of weeks, always leaving at least 6 inches of plant visible above the soil level.
Leaves that are covered will fall off and new potato-forming rhizomes will take their place.
9. Begin Harvesting After Flowers Have Bloomed
Once your plant begins to flower, you can start harvesting potatoes.
For traditional pots, this means pushing your fingers carefully into the soil and feeling for fully developed tubers. Twist and pull them out gently to avoid damaging the plant. With a potato pot, you can simply open the door and pull tubers out without disturbing the surrounding soil.
Harvesting while the plant is still alive will provide you with fresh potatoes throughout the summer. But it isn’t necessary to harvest at this point.
NOTE: Potatoes that have a greenish tint should not be eaten. This tint is proof of a high concentration of solanine, a bitter chemical that can cause digestive upset. Tubers typically only turn green if exposed to sunlight. Consistently hilling your plants will prevent this problem from occurring.
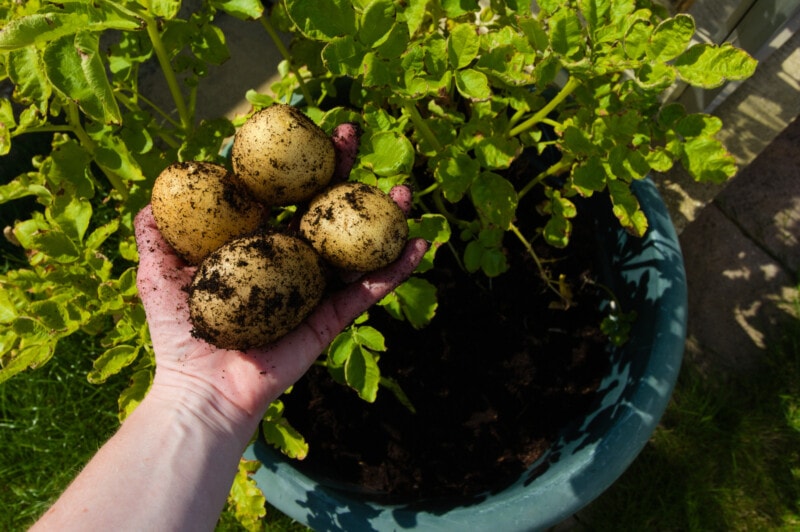
10. Complete Your Final Harvest After Plants Have Yellowed
Once your plant dies, usually late summer to early fall, you can complete your final harvest.
After the plant has turned yellow, stop watering it completely. Exposure to dry conditions will cure the tubers, which will help them last longer in storage.
After a week, tip your pot over onto a tarp. You will quickly be able to find and pull out all of the potatoes your plant produced.
Wipe the potatoes down with a dry rag to remove excess soil, but don’t wash them unless you intend to use them right away. The layer of dry dirt on the skin will help preserve the tuber’s freshness and increase its shelf life.
Common Problems You Might Face
Potatoes are generally hardy and not prone to many diseases, especially when planted in pots away from other foliage. But there are still a few issues that might pop up. Here are some of the more common problems seen when growing potatoes in pots.
- Failure to Emerge – Buying good quality seed potatoes and covering them with 4 to 6 inches of warm soil should produce shoots in only a couple of weeks. Potatoes purchased at the grocery store often fail to produce shoots due to chemical additions meant to retard the sprouting process.
- Holes in Leaves or Tubers – There are a number of worms and pests that feed on potatoes and potato foliage. Cleaning pots with soapy water and using fresh potting soil each year will help prevent these issues. If you have other gardens or areas of open soil, keep your container garden separate to prevent bugs from moving between them.
- Green Tops But No Tubers – If the weather is too warm–particularly at night–during tuber production, fewer potatoes will form. Moving your pots out of the sun and into a cool area of shade in the late afternoon and then back in the morning, can help lower the overnight soil temp to encourage tuber growth.
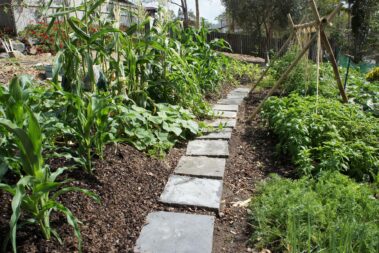
More Container-Loving Crops
Potatoes make surprisingly good candidates for container gardening, but they aren’t the only veggies that grow well in a confined space. Check out some of our other articles on growing vegetables in pots to find out what additional varieties you can add to your new container garden.
- How to Grow Basil in Pots Year Round
- How to Grow Sweet and Plentiful Sugar Snap Peas
- How to Successfully Grow Eggplant in Containers
- 9 Tips for Growing Prolific Cherry Tomatoes in Pots
- The 10 Easiest Vegetable to Grow in Pots
I grew up in Colorado under the influence of three generations of knowledgeable women who knew their way around the garden. I graduated from Colorado State University with a bachelor of science in biology and a minor in English. A year before graduation, my life was upended by an unexpected diagnosis of Type 1 Diabetes.
Facing the reality of living with an incurable autoimmune disease I left to reflect hard on my lifestyle. While this type of diabetes cannot be cured or treated with diet, I was certain that focusing on my health and fueling my body with clean food would help better manage the condition. As a lifelong animal lover, it wasn’t difficult for me to transition fully to a vegan diet.
When I'm not constructing articles for clients, you can find me wrist-deep in dirt in my vegetable garden, hiking with my dogs, or back in front of the computer creating imaginative worlds in my quest to become a published fiction writer.
[email protected]
- How to Pick the Perfect Watermelon For a Sweet Summer Treat - April 10, 2024
- Future Kind’s Foundations: A Multivitamin Made for Vegans - December 5, 2023
- Does Nutritional Yeast Go Bad? - November 28, 2023