In this article, we’ll show you how to grow crunchy, spicy, yummy radishes in containers. We’ll also take a look at the best varieties for such a confined space and some of the common problems you may run into with this fast-maturing vegetable.
Table of Contents
Which Radish Varieties Grow Well in Pots?
The truth is, you can get away with growing most types of radish in pots. But choosing those with specific characteristics will make the task even easier.
Here are a few things to consider when shopping for radish varieties for your container garden.
- Shape and size – Radishes come in two shapes: round and oblong. Some of the larger oblong varieties require a lot of soil space to mature properly. You can plant these types in deep pots and they will do fine, but you won’t be able to grow as many. Instead, consider a small round variety that can be planted in wide, shallow pots and closer together.
- Time to maturity – The fastest-growing radishes go from sprout to edible veggie in just 25 days. The slowest growing types take just over two months. Since radishes taste the best when they are harvested while the weather is still cool, it is wise to consider the length of your spring or fall before choosing a variety.
- Color and taste – Whether you are planting radishes in the garden or in pots, it is wise to find a variety you’ll actually want to eat. Some are zesty, verging on downright spicey. Others are mild and sweet. Radishes also come in a variety of colors from white to yellow to purple.
Our advice? Choose a few different types of radishes and experiment. Odds are, more than one option will do well in your climate, providing more variety for your plate.
9 Tips for Growing Radishes In Pots
Radishes are one of the easiest root veggies to grow. But there are a few things to keep in mind, especially when planting in containers.
Here are our nine tips for radish container garden success.
1. Choose a cool sunny spot
Radishes are a cool-season vegetable. This means they prefer to be planted and mature while the average temperatures are around 60 degrees. They are hearty plants and can endure light frosts, but seedlings may succumb if hit too hard by the cold too early.
When planning your radish container garden, look for a spot that gets plenty of sunlight (at least six hours) but won’t get too hot in the direct afternoon sun.
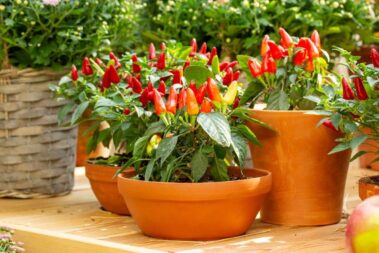
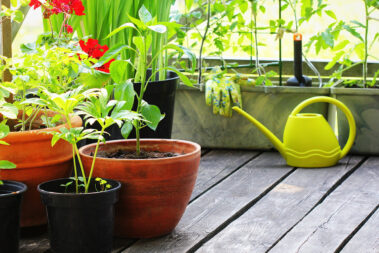
2. Find a wide, deep pot
To maximize your yield, look for a pot that is wide (either long or round with a large diameter) and at least 6 inches deep. If you are growing oblong radishes you may need a pot closer to 10 inches deep.
Pots made of any material can be used, but each type does have its advantages.
Plastic is lightweight and easy to move in and outside as needed. It is also easier to punch extra holes in if you run into drainage problems.
Ceramic is more earth-friendly and less likely to blow around in the wind. Look for ceramic pots with adequate drainage. Humid climates will benefit from porous ceramic (non-glazed) which will increase airflow and help manage excess moisture in the soil.
3. Add loose potting soil
Good quality potting soil is essential for all container gardens, but it is especially important when you are growing root vegetables.
Clumpy, rocky, or dense soil can lead to malformed radishes and stunted production. Instead of recycling old garden soil, opt for fresh potting soil that is loose and sandy enough to allow for proper growth.
Potting soil also does a better job of retaining moisture without oversaturating roots than dirt alone.
4. Choose multiple varieties
Radishes of the same type will all ripen at the same time. If you are planting a lot of radishes, this can be problematic (unless you really enjoy eating radishes for every meal).
By choosing multiple varieties that mature at different times, you can assure your harvest comes in waves, rather than all at once. This is also a great way to extend your radish season, even if your window for sowing succession crops is limited.
5. Sow seeds when the weather is cool
Plant your radish seeds directly into your pot in early spring. In most climates, this can be done up to a month before the last frost. If you do get an especially cold day, you can always bring your pots into the garage or cover them for the night to protect young seedlings.
Radish seeds are tiny, which makes planting them in individual holes a little challenging. Instead, sprinkle your seeds over the soil evenly. Then cover them with about ½ inch of soil.
Once sprouts reach about an inch tall, begin thinning your crop so each plant is spaced at least 1 inch apart.
Radish seeds can also be sowed once the season begins to change at the end of the summer for a late fall harvest.
6. Water consistently
As soon as the seeds are in the pot, begin watering to maintain damp but not overly saturated soil. So long as your pot has adequate drainage and you are not using a saucer, you shouldn’t have to worry about the soil getting too soggy.
Shallow pots are at a greater risk of over-drying than those with more soil volume. Be sure to check your soil daily and water as needed.
Fertilizer is typically not necessary with radishes.
These root veggies mature quickly and thus don’t require a lot of added nutrients. Adding extra fertilizer can even hinder the root growth process by encouraging leaf development over bulb growth.
7. Weed often and maintain
Weeding can be an especially difficult process when growing root veggies because any disturbance to the soil can cause the crop’s roots to become malformed. To avoid this, you need to remove any weeds as soon as they sprout, before they develop deep root systems.
The same is true of weeding around radishes in pots, but you are much less likely to have to deal with a lot of weed growth. So long as you check for weeds periodically and remove them while they are small, you shouldn’t have any issues.
One more thing you want to be on the lookout for is crowning radishes.
Any root material that is exposed to the air is likely to become woody and tough. If you can see your radish bulbs peeking above the soil, cover them with some dirt to protect them from the air and sun.
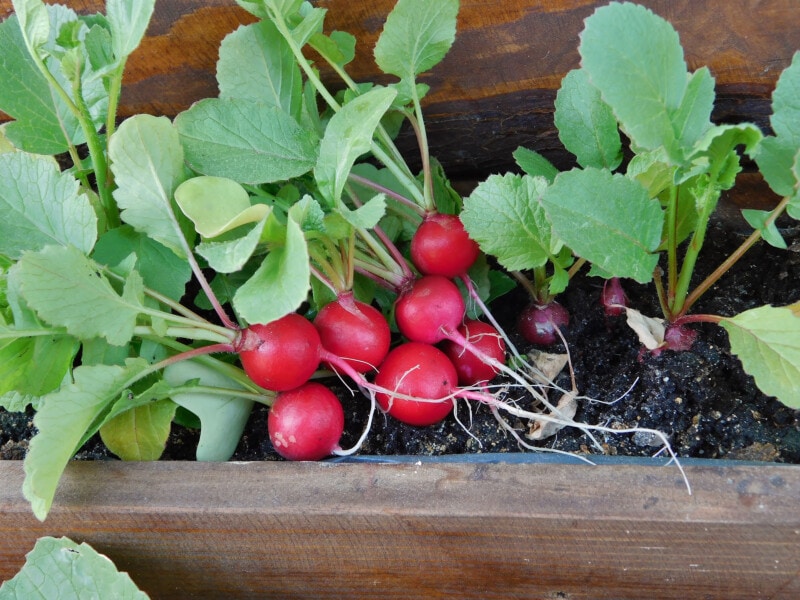
8. Check bulbs and harvest
Pay attention to the expected harvest date based on the instructions on your seed packets. Once you are near that date, carefully move the soil away from the base of some of the radish greens. If the top of the radish bulb appears to be the expected size, it is time to harvest!
Radishes that are harvested early and while the weather is still cool will have the most flavor and the best texture. Larger, more mature radishes will be sweeter but can quickly become pithy or woody.
You can store extra radishes in your fridge by cutting away the greens and placing the bulbs in a container of water.
9. Plant more!
Once your first harvest has been pulled, consider planting another round of seeds.
Fast-growing radishes take less than a month to mature. In most climates, this means you can get two or three rounds in before the weather gets too warm.
If your weather does happen to turn before your final crop, move your pots to a cooler location that receives plenty of morning sun but is shielded from the afternoon heat.
Common Problems You Might Face
Because they grow so quickly, radishes aren’t prone to a ton of diseases. This is doubly true of radishes grown in pots.
Still, there are a few issues that may crop up when you are growing these zesty roots. Here are a few to be aware of.
- Flea beetles – These tiny, shiny, black beetles like to hop around on lettuces and greens and can make quick work of young radish leaves. If you notice tiny holes in your radish greens and black bugs hanging around, dust your leaves with talcum powder to repel these thin-skinned pests.
- Cracked bulbs – Radishes will crack if they experience periods of drought followed by periods of heavy watering. To avoid this, make sure to keep your soil consistently moist by watering on the same schedule and adjusting to account for increasing temperatures.
- Undersized bulbs – If your radishes seem all greens and no root, the weather is likely to blame. If the temperatures heat up before the bulbs form, the plant will reallocate its resources for growing leaves and, eventually, flowers.
By keeping your container garden away from native flora and existing in-ground gardens, you can easily reduce problems associated with pests. Watering consistently, using fresh soil each year, and keeping your radishes cool, should help alleviate most other issues.
FAQ
What is the best container to grow radishes in?
The best containers for radishes are both wide and somewhat deep. Look for a long pot or a circular pot with a wide diameter. The pot should be at least 6 to 10 inches deep, depending on the type of radish you plan to grow.
How many radishes can I plant in a 5-gallon bucket?
You could easily grow up to 18 radishes in a five-gallon bucket. However, to better maximize your space, I recommend getting a shallower container with more surface area so you can grow even more with the same amount of dirt.
How many radishes will one plant produce?
Each radish plant produces just one radish. This is because, like carrots, the radish makes up the entirety of the radish plant’s taproot.
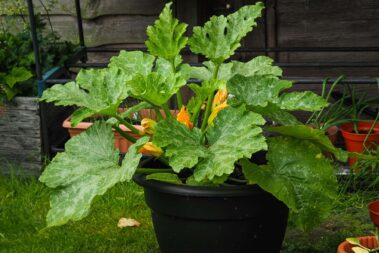
More Container-Loving Crops
Radishes are the simplest root veggies to grow in pots, but did you know you can also grow carrots in containers?
Here are a few more vegetables that do exceptionally well in container gardens.
If you love these gardening tips, be sure to sign up for our newsletter for more exclusive clean, green, simple content like this.
Rocking It with Radishes
Radishes are not only some of the easiest vegetables to grow but some of the easiest to grow in pots. All you need is the right variety and our nine tips from above to find success.
What is your favorite recipe to use your homegrown radishes in? Let us know in the comments below.
I grew up in Colorado under the influence of three generations of knowledgeable women who knew their way around the garden. I graduated from Colorado State University with a bachelor of science in biology and a minor in English. A year before graduation, my life was upended by an unexpected diagnosis of Type 1 Diabetes.
Facing the reality of living with an incurable autoimmune disease I left to reflect hard on my lifestyle. While this type of diabetes cannot be cured or treated with diet, I was certain that focusing on my health and fueling my body with clean food would help better manage the condition. As a lifelong animal lover, it wasn’t difficult for me to transition fully to a vegan diet.
When I'm not constructing articles for clients, you can find me wrist-deep in dirt in my vegetable garden, hiking with my dogs, or back in front of the computer creating imaginative worlds in my quest to become a published fiction writer.
[email protected]
- How to Pick the Perfect Watermelon For a Sweet Summer Treat - April 10, 2024
- Future Kind’s Foundations: A Multivitamin Made for Vegans - December 5, 2023
- Does Nutritional Yeast Go Bad? - November 28, 2023