Growing mushrooms is a great way to increase your access to all the amazing health benefits these fungi have to offer. But doing so is nothing like growing flowers or vegetables.
Gardening is usually about sunshine and getting your hands in the dirt. But growing your own mushrooms requires a dark, humid space. And forget the dirt—these strange creatures prefer spent grain and dung.
Don’t think you have what it takes to grow fungi? Think again.
Below, we’ll walk you through 6 easy steps to grow your own edible mushrooms at home in no time. We’ll also give you some tricks and product recommendations that will make the process even easier.
Table of Contents
What Do You Need to Grow Edible Mushrooms?
It’s true that growing mushrooms is nothing like traditional gardening, but that doesn’t mean it has to be complicated. All you need are a few key ingredients and the knowledge to turn them into something wonderful.
Here’s everything you’ll need to grow edible mushrooms indoors:
- Substrate – This is a fancy word for the stuff mushrooms grow on. Some species prefer woody materials like sawdust and cardboard. Others grow only in grain mixtures or on dung (don’t worry, you can now find “dung-like” substrate that smells much better than the real thing).
- Spawn – While it is possible to grow your own mushrooms from spores (the fungus equivalent of seeds) it’s much easier to start with spawn. Spawn is substrate that has mushroom mycelium already growing in it. This mycelium gives rise to fruiting bodies, what we typically think of as “mushrooms.”
- Growing Bags or Containers – Mushrooms require a lot of CO2 and humidity to grow. This is why it’s easier to grow mushrooms in bags than in pots. It’s possible to use other containers, but for beginners, bags are the way to go.
- Spray Bottle – Did we mention mushrooms like it moist? To keep your substrate humid enough, you’ll need to mist it with a spray bottle a few times each day.
- Thermometer – Different species of mushrooms have different temperature requirements. If you’re serious about growing fungi, we recommend getting a thermometer-hygrometer combo product like this one.
Grow Edible Mushrooms In 6 Easy Steps
Growing mushrooms at home has never been easier. There are many online companies that provide all-in-one kits that come prepackaged with spawn and substrate in an easy-to-use container. Some of our favorite options for these beginners’ kits are Foraged, GrowCycle, North Spore, and Back to the Roots.
But if you’d prefer to create your own mushroom oasis, then keep reading.
Below, we outline 6 simple steps for choosing the right mushrooms and building the perfect indoor habitat to help them flourish.
Step 1: Choose Your Mushroom Type
The first step to success with mushrooms is choosing the right kind for your needs, environment, and skill level.
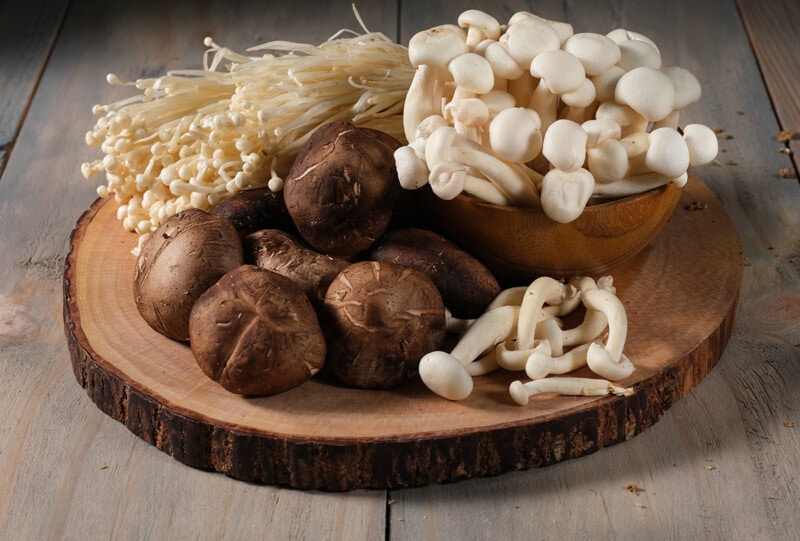
Generally speaking, the easiest mushrooms to grow are oyster, lion’s mane, and shiitake. These types aren’t too fussy about their substrate and grow well at normal indoor temperatures. They are also easy to use, both in the kitchen and for their medicinal qualities.
But these are far from the only kinds of mushrooms you can grow in the house. We suggest starting easy with one of the above options, then branching out as you get the hang of the process.
Make sure you only order spawn from reputable online retailers to avoid mislabelled or impure products. We like North Spore for its variety of indoor-compatible spawn options.
Step 2: Get the Right Substrate
What substrate you’ll need depends on the type of mushroom spawn you choose.
Oyster mushrooms will grow in any lignocellulosic material (plant mass) including sawdust, cardboard, grain mix, and even coffee grounds. Lion’s mane grows best in hardwood sawdust. And shiitake mushrooms can be grown in sawdust, but do best in sawdust mixes or supplemented sawdust.
Whatever mushroom type you choose, make sure to research the optimal substrate to use.
The substrate typically needs to be sterilized before use. This guarantees that no other fungus spore or mycelium is present to compete with or confuse your harvest. You can sterilize substrate at home, but for beginners, we recommend buying pre-sterilized mushroom substrate from a reputable dealer.
Step 3: Choose a Container
You can grow mushrooms in just about any container that can hold the substrate, retain moisture, and trap CO2. But some are certainly easier to use than others.
We’ve seen some great tips for growing mushrooms in small trough pots and 5-gallon buckets. But for beginners, we highly recommend using specialty mushroom grow bags.
These gusseted autoclavable polypropylene filter patch bags (talk about a mouthful), are perfect for growing small batches of mushrooms. They are heat resistant for sterilizing, have a filter patch to let air in while keeping impurities out, and seal for easy mycelium propagation.
Many of the mushroom kits you can buy online utilize these kinds of bags inside their pretty boxes.
Step 4: Mix the Spawn and Substrate
Mixing spawn into your substrate is a process known as inoculation. When doing this, you want to keep things as clean as possible. That means mixing the two substances in a sterile bowl using sterilized instruments.
Once mixed according to the instructions provided with your spawn, add water to moisten the substrate. Then add the inoculated substrate to your grow bag or container. Seal your bag or cover your container with a damp towel.
Step 5: Keep Things Dark, Moist, and Cool
In general, mushrooms like it dark, moist, and cool. But every species has its specific preferences in these areas.
- Oyster mushrooms like the humidity to be between 80 and 95% and the temperature between 68 and 86 degrees. They grow best with low amounts of indirect light.
- Lion’s mane mushrooms prefer high humidity and temperatures between 59 and 68 degrees. They like it shady and fare better with lots of indirect light than other species.
- Shiitake mushrooms prefer humidity levels between 80 and 90%. They like it cooler, between 45 and 70 degrees, making them a good option for winter basement growing. And they do well in indirect light.
Make sure to research the optimal conditions for your mushroom variety.
In general, basements, cellars, and dark bathrooms are great places to grow mushrooms. You can even grow many dark-loving species in the cupboard under your sink.
Step 6: Harvest and Enjoy!
After your inoculated substrate sits for a while, you will begin to notice white, spiderweb-like mycelium growing throughout the container. Think of this as the roots of the mushrooms taking shape.
Once the entire bag is filled with mycelium, your fungus is ready to fruit. If using a grow bag, cut the top off to give the fungus some air and encourage fruiting. For regular containers, it’s time to remove the cover.
Most mushrooms require slightly more light to entice fruiting. Some also require a temperature change. Most still need high humidity, so be sure to mist your substrate multiple times per day.
Once fruiting conditions have been met, you should see mushrooms start to develop within a couple of weeks. But how long this process takes depends on the species.
What to Do with Your Home-Grown Mushrooms
Once you’ve harvested your mushrooms, it’s time to put them to use. The best way to do this really depends on what you’ve grown. Many species are perfect for including in the kitchen while others are prized for their medicinal qualities and can be dried to turn into supplements.
Cook Them
You’ve likely worked with shiitake mushrooms in the kitchen before. Oyster mushrooms are also fairly common in more exotic recipes. But the truth is, all edible mushrooms have their place on your plate.
Many can be eaten raw while others need to be (or taste better) cooked. Make sure you are familiar with the preparation needs of your mushrooms before using them in the kitchen.
Here are a few mushroom-heavy recipes to inspire you and help put that harvest to use.
- Mushroom and Asparagus Risotto – Great with cremini, but you can also use portobello, shiitake, maitake, and wine caps.
- One-Pot Vegan Mushroom Stew – Another great option for large-cap mushrooms such as shiitake, portobello, and button mushrooms.
- Shiitake Mushroom Bacon – This awesome shiitake recipe can also be made with large oyster mushrooms.
- Vegan Mushroom Gravy – This savory sauce is best made from earthy, flavorful shrooms like baby bellas, shiitake, and other dark-capped options. For a more mild sauce, try using white button caps.
- Roasted Asparagus and Mushrooms – This simple recipe works well with a variety of mushrooms from lion’s mane to enoki—so feel free to get creative!
If you find you have more mushrooms than you can possibly eat, don’t fret. You can easily freeze your mushrooms and use them later.
Dry Them
In addition to being a healthy ingredient to include in meals, many mushrooms are also packed with adaptogens and phytochemicals that make them worth consuming daily. The best way to take advantage of these benefits is by dehydrating your mushrooms and turning them into a powder.
Not only does low-heat drying help preserve the nutritional value of mushrooms for longer, but it makes them super easy to store and use.
Add your homegrown mushroom powder to your morning smoothies and savory sauces, or put it in capsules and take it as a supplement. If you want to get really creative, you can try your hand at making your own mushroom coffee.
If you’re looking for a way to preserve your cooking mushrooms for the long term, drying is a great option. Store your dried mushrooms in vacuum-sealed bags and rehydrate them as needed.
FAQ
What is the best resource to learn more about mushrooms?
If we’ve grabbed your attention to the effect of Mushrooms and want to go one step futher in your journey, check out our friends at Foraged. If you want to live in or off the earth, but can’t yet make it work Foraged offers you instant access, metaphorically, to the world of mushrooms for supplies, education and consumption.
How long does it take to grow edible mushrooms?
It can take anywhere between a couple of weeks and a few months to grow edible mushrooms. It generally takes a few weeks for the mycelium to mature after prepping your spawn and substrate. It will take an additional couple of weeks to a month before fruiting bodies form.
If you want to speed up the process, we suggest buying a mushroom kit. These typically include mature inoculated substrate that is ready to fruit.
What are the fastest mushrooms to grow?
Oyster mushrooms are the fastest-growing mushrooms out there. These easy-to-grow fungi go from inoculation to mature mycelium in under two weeks. And they will start fruiting after just 7 days.
What are the easiest mushrooms to grow at home?
The easiest mushrooms to grow at home are oyster mushrooms. Not only do they mature quickly, but they are tolerant of a range of temperatures and light conditions. Lion’s mane, shiitake, wine cap, and pioppino are also great options for beginners.
I grew up in Colorado under the influence of three generations of knowledgeable women who knew their way around the garden. I graduated from Colorado State University with a bachelor of science in biology and a minor in English. A year before graduation, my life was upended by an unexpected diagnosis of Type 1 Diabetes.
Facing the reality of living with an incurable autoimmune disease I left to reflect hard on my lifestyle. While this type of diabetes cannot be cured or treated with diet, I was certain that focusing on my health and fueling my body with clean food would help better manage the condition. As a lifelong animal lover, it wasn’t difficult for me to transition fully to a vegan diet.
When I'm not constructing articles for clients, you can find me wrist-deep in dirt in my vegetable garden, hiking with my dogs, or back in front of the computer creating imaginative worlds in my quest to become a published fiction writer.
[email protected]
- Parsnip vs Turnip: What’s the Difference? - April 2, 2026
- 4 Vegan Worcestershire Sauce Substitutes (+ Our Homemade Recipe) - April 2, 2026
- 39 Different Types of Edible Mushrooms - April 1, 2026